Supplies:
One 4 1/4" x 8 1/2" piece of cardstock (yellow - card base)
One 3" x 8" piece of cardstock (red - flap)
One 4" x 5" piece of cardstock or dp (blue patterned)
One 2 3/4" x 4" piece of cardstock or dp (plain blue)
Two 2 3/4" x 3/34" piece of cardstock or dp (yellow - for inside and outside of red flap)
Additional cardstock
Scor-pal
adhesive
stamps
ink
dimensional
dimensional
optional - punches, versamark
Step 1
Score (yellow base) cardstock 4 1/4" x 8 1/2" at 5 1/2".
Step 2
Step 3
Step 4
Step 5
Step 6
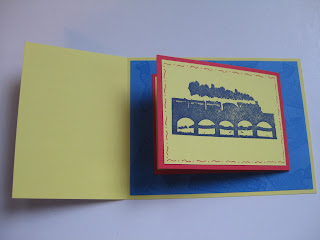
Here's the finished card, using Mark's Finest Papers - A Heinrich Co. set called "Train Tracks".
I hope by adding the colors I used makes it easier for you to see the sizes of the cardstock!!


5 comments:
I know someone who will like that train card... :)
Great card, great tutorial!! The colors you used are terrific and great for a boy, or anyone.
Awesome tutorial, Ms. Anne. Wonderful card too - thanks for sharing.
Fun train card, thanks for the tutorial.
Well done tutorial, my friend. Awesome card!
Post a Comment